 FREE delivery over £500*
 Price Match Promise
 Finance options available*
 Rated Excellent on Trustpilot
How to fit a basin mixer tap
16th Mar 2015
* Please note we assume that your tap plumbing is already in place and that you’re swapping an old mixer tap for a new one.
Sometimes all it takes is a new basin mixer tap to transform the look of your bathroom, a new bathroom tap can add a contemporary, elegant or even a traditional look to the room. Although not surprisingly this quick update is often out of reach with the average plumber charging around £50-£70 to replace a basin tap. You can easily & successfully fit a basin tap yourself with only a few tools and this ‘How To’ guide, not only will you save a fortune you’ll also feel confident and proud of your new found DIY skills (this guide can also be applied to a kitchen basin mixer). So here it is folks the guide that’s about to save you £70!

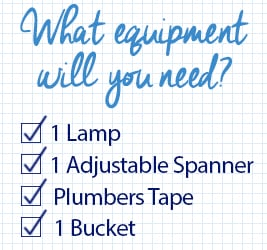
- Turn the water off at the mains and drain any excess water from the system by turning the taps on and letting the water escape. Make sure you have a bucket close by just in case, you don’t want to end up soaked before you’ve even started.
- Next, insert the plug into the basin you’re working on. Remember to remove any rings or jewellery at this point to stop you from damaging or losing them.
- Clear your work area and borrow a lamp from another room to get a good view of what you’re doing. Next, you’ll remove the old tap using an adjustable spanner. Looking at the underside of the basin (use the lamp), locate the nut that holds the tap in place, loosen and remove (hold the body of the tap in place as you remove the nut to prevent damage to your basin). Sometimes if the tap is old, the nut can be rusted on which can be a bit tricky to remove, all you have to do in this situation is spray with WD40 and leave for 10-15 minutes and try again. Once the tap is loose, lie flat on a cloth or old piece of fabric.
- Next, you’ll need to disconnect the tap from the water supply. You’ll see two pipes attached to two hoses that are part of the tap, you need to loosen these with a spanner. Once completely disconnected remove the old tap and dispose.
- Follow the instructions that come with the tap, they’ll tell you where to place essential nuts, washers and internal components exactly where the need to be.
- Place the new tap in position and tighten the nut on the underside to secure the tap in place. Do this step first or your tap will be spinning around when you connect it to the water supply.
- Next, connect your new tap to the water supply, use the spanner to tighten your tap hoses to the pipes below. We recommend that you use plumbers tape around the pipes and the hoses to ensure a tight, waterproof seal. Make sure all connections are well tightened, but don’t overdo it as you could damage the internal pipe work.
- It’s now time to turn on the water, first of all check for drips and if need be tighten the joins again. Slowly turn your tap on, if everything looks good it’s time to start using your tap…Enjoy!
We understand that this might seem a bit daunting if you’ve never tried to replace a tap, but it is really easy. Just take your time and follow this step by step guide, you really can’t go wrong….honestly it’s safe to say if I can do it, anyone can. You can pop into our Glasgow showroom to view our full range of basin mixer taps located here or alternatively view our full range on our website here.