 FREE delivery over £500*
 Price Match Promise
 Finance options available*
 Rated Excellent on Trustpilot
How to tile your bathroom floor
24th Sep 2014
In today’s climate, simple changes like tiling your bathroom floor can set you back a staggering £500 (for a small bathroom). So we thought we’d share our expertise with you to save you some hard earned cash as well as help you learn a valuable skill. Tiling a floor can be a bit tricky if you’ve never done it before, but by following this simple step by step guide you really can’t go wrong, some techniques are just a case of trial and error. By doing this job yourself you can take your time and get things exactly how you want them instead of putting your trust in a stranger. So here it is our 7 step guide that will have you tiling with confidence in no time…
- If you have a concrete floor then you’re good to go but if you have a timber floor you’ll need to add a plywood layer onto the floor to prevent movement which can crack your new tiles. This is quite easy, just measure out the size you need and go to your local diy superstore. They’ll be able to advise you on thickness and will even cut the wood to size for you. You want your plywood in 3 or even 4 pieces so you can quickly fix in place and cut around pipes if necessary (this is a lot easier than fighting with one huge piece of wood). Screw the plywood to the floor and counter sink the screws so they don’t affect the tiles. You'll need to seal the floor with a PVA wash to ensure the adhesive bonds to the floor properly. Clean the floor thoroughly, remove any debris as this may prevent your tiles from adhering properly.
- Start laying out your tiles (starting with the most visible corner of the room) use full size tiles with tile spacers and lay about 2 rows. Step back and have a look at this point, does it look good? Is there anything you want to change? Make any changes to the design just now and keep checking that it will look good before you apply any adhesive.
- If you’re happy with how your design looks, take a photo with your phone. Move the tiles to the side and get your tile adhesive ready. If you’re new to tiling, we’d recommend that you use the readymade adhesive which is slightly more expensive but it’s so convenient and saves any laborious mixing. Give it a good mix to ensure an even consistency.
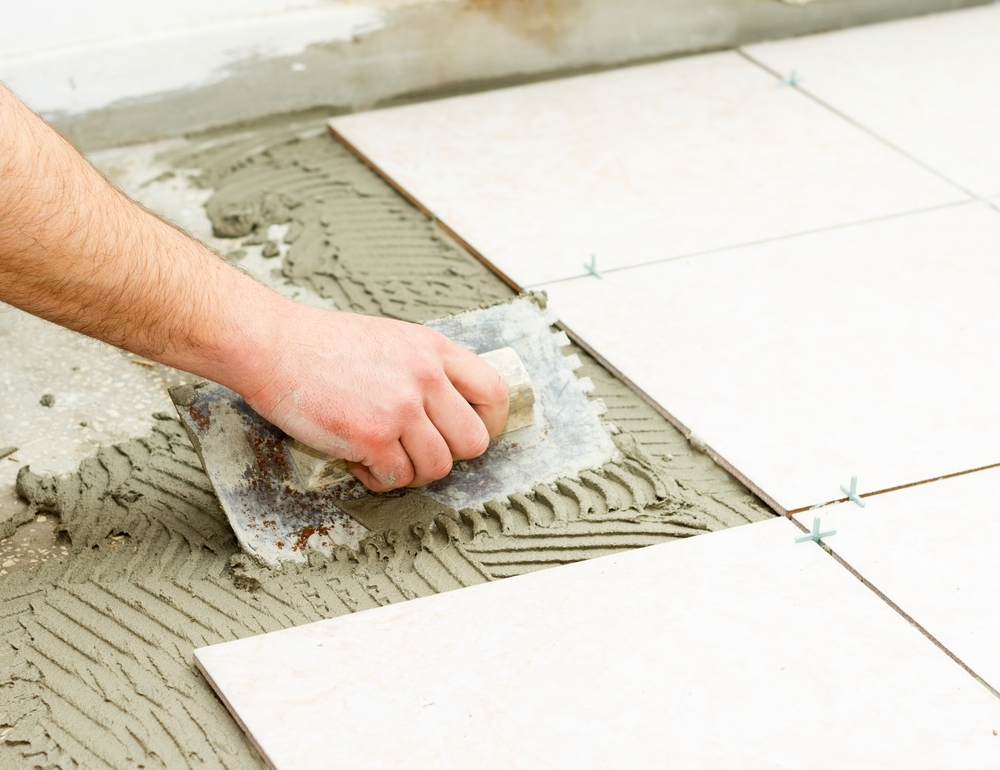
- Start to spread the adhesive using a notched trowel (you usually get a free plastic one with your adhesive) apply at an angle to create an even thickness. The key to this is to complete one small area at a time. Only apply enough adhesive to lay about 4 or 5 tiles at a time.
- Press the first tile firmly in place. Using a soft mallet, cover the tile with an old cloth and gently tap it down (usually at each corner and in the centre). Apply a small tile spacer and place the second tile in place. Continue until you have finished that small area and then apply the adhesive again. Remember to step back frequently to ensure that the tiles look straight and that your design matches the photo on your phone.
- You’d need to be incredibly lucky not to have to cut tiles to fit around obstacles, so you’ll need to buy a tile scorer or a snap cutter. This bit can take some practise so it’s a good idea to test your skills on an old tile or on a tile you know you won’t need. Practise scoring the tile and then breaking it without any casualties, if you are confident then give it a go. It’s a good idea to mark out the area you need to remove with a pencil to give you a guide before you start to cut.
- Once you’re happy with the overall layout of the floor and have completed all the tricky bits you’re ready to grout. Check the adhesive tub to see how long it will take to set, you must leave the tiles to dry completely before you grout (usually 24 hours). Choose your preferred colour of grout (there are many available but we recommend using a dark grout for floors as white or cream will discolour really quickly in a busy bathroom). Spread the grout into the grout lines using a grout float and try and remove any excess off the tiles as you go. Once all the grout lines have been filled use a damp sponge to completely remove any grout from the surface of the tiles (as this will be nearly impossible to remove once dry). Once complete, allow the correct amount of time (see tub) for the grout to dry properly. Hey presto! You’ll have a brand new bathroom floor that looks amazing and has saved you a small fortune.
Things to remember
- Depending on the size of your bathroom a job like this would take around two days to complete, but don’t feel disheartened if it takes a bit longer. Tile cutting is probably the trickiest part and if you feel yourself becoming frustrated, step away and go back to it another day. Remember there’s no rush!
- It may seem like a daunting task, but just take the time to plan it out well and you’ll be surprised with the result.
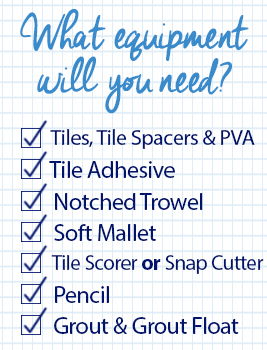
- Make sure you’ve got all the necessary equipment before you start, there’s nothing more annoying when you can’t crack on because you forgot to buy a tool.
- Don’t panic! If you reach a point of despair, take a step back and try to find the problem, you’ll be able to fix it, that’s why we recommend completing small areas at a time.
- Be confident scoring tiles! Make a guide and mark it with a confident, strong stroke. A light, wavering mark will only cause trouble because the tile won’t break where the mark was made.
Don’t scoff at the idea of this, anyone can do it well. A few years ago my aunt decided to tile her bathroom herself and I must admit we all thought that this was hilarious, she’d never done diy in her life so naturally we all expected it to be a complete disaster. In the end we all had to hand it to her, she took her time, consulted YouTube videos and I have to say it is one of the best tiling jobs I’ve ever seen. So just remember to be patient, don’t be afraid to check the internet for advice, you’ll learn a skill that you can use throughout your life.