
 Track Order
 Wishlist
 Sign In

 FREE delivery over £500*
 Price Match Promise
 Finance options available*
 Rated Excellent on Trustpilot
How to Fix a Dripping Tap: Stop the Leak in 5 Simple Steps
8th Jul 2026

There's nothing worse than a dripping tap. Whether it's the relentless sound that keeps you awake at night or the sight of your hard-earned money slowly trickling down the drain, a leak is a major annoyance in any household.
If you've been ignoring that repetitive drip in your kitchen or bathroom, you're not alone. It's easy to turn a blind eye, but over time, even a minor leak can turn into an expensive problem.
Thankfully, fixing a dripping tap is usually a quick, straightforward job you can tackle yourself, sparing you the cost of calling out a plumber and getting your home running smoothly again.
We'll break down the main causes of tap leaks, explain why immediate action is so important, and walk you through replacing a tap washer in just 5 simple steps. We've also included expert insights from Brian Toward, CEO here at Wholesale Domestic, to help you get the job done right.
Contents
- What causes a dripping tap?
- Why is it important to fix a leaking tap immediately?
- What does a tap washer do?
- What are the signs your washer needs to be replaced?
- What types of tap washers are there?
- Where is the tap washer located?
- How to fix a dripping tap in 5 simple steps
What causes a dripping tap?
Taps are one of the most regularly used appliances in any home, which unfortunately means their internal components are constantly being put under pressure. Over time, this natural wear and tear leads to small faults inside the tap mechanism.
The exact cause of your leak usually depends on the type of tap installed in your home. The most common causes behind a dripping tap include:
- Worn-out washers – Traditional compression taps rely on small rubber or silicone washers to block the flow of water. Every time you turn the handle to close the tap, the washer is pressed tightly against the metal valve seat. Over time, friction, mineral deposits, and water pressure cause the washer to harden, split, tear, or flatten, allowing water to seep through.
- Damaged O-rings – The O-ring is a small, circular rubber band that sits around the tap stem. Its job is to provide a watertight seal between the sink and the tap's moving parts. If you notice your tap leaking from the base or dripping around the handle, a brittle, broken, or wonky O-ring is likely to be the cause.
- Broken ceramic cartridges – Modern taps (like lever taps and quarter-turn models) don't use traditional rubber washers. Instead, they're fitted with internal ceramic disc cartridges. While these are durable, they're not indestructible. Over time, microscopic grit or mineral buildup from hard water can scratch the smooth ceramic plates, stopping them from closing properly and creating a leak.
- Corroded valve seats – The valve seat acts like a bridge between the tap washer and the rest of the internal mechanism. If you live in an area with hard water, limescale can accumulate on the valve seat, causing corrosion or an uneven texture. When this happens, even a brand-new rubber washer will struggle to form a tight seal, letting water escape.
- High water pressure – If the water pressure in your home's plumbing system is set too high, it can put strain on the internal seals and gaskets of your taps. This high pressure can force water past even healthy seals, leading to a persistent drip.
Why is it important to fix a leaking tap immediately?
When you have a busy schedule, a dripping tap might feel like something you can put off until next weekend. However, taking a relaxed approach to fixing a leaking tap can have surprisingly expensive consequences for your household budget and the environment.
Whether you've noticed your tap leaking from the spout or base, leaving the issue unresolved means throwing money down the drain (literally). A single dripping tap can waste up to 5,500 litres of water every single year. To put that into perspective, that's enough water to fill a standard paddling pool every single week in the summer.
If your home is fitted with a water meter, this will show up directly on your utility bills. And if the leak is coming from your hot water tap, your boiler is constantly working to heat water that is dripping away unused, driving up your energy bills.
You can learn more about cutting your water consumption in our water waste report.
Beyond the cost, a constant leak can also cause damage to your kitchen or bathroom. Water dripping onto porcelain or acrylic basins can leave behind stubborn brown stains that are difficult to clean. And if water's escaping from the base of the tap, it can slowly pool on your worktops, seep into vanity units, cause timber to rot, and create damp patches where mould can thrive.
Brian explains: "There are usually signs that a tap washer is on its way out before you've wasted too much water, whether it's a noticeable drip or you're straining to turn the tap on. Catching a faulty washer early on can help you avoid high water bills down the line."
"This is especially true if it's a hot water tap, as you're not only wasting water but also adding extra costs to your energy bill," He adds.
What does a tap washer do?
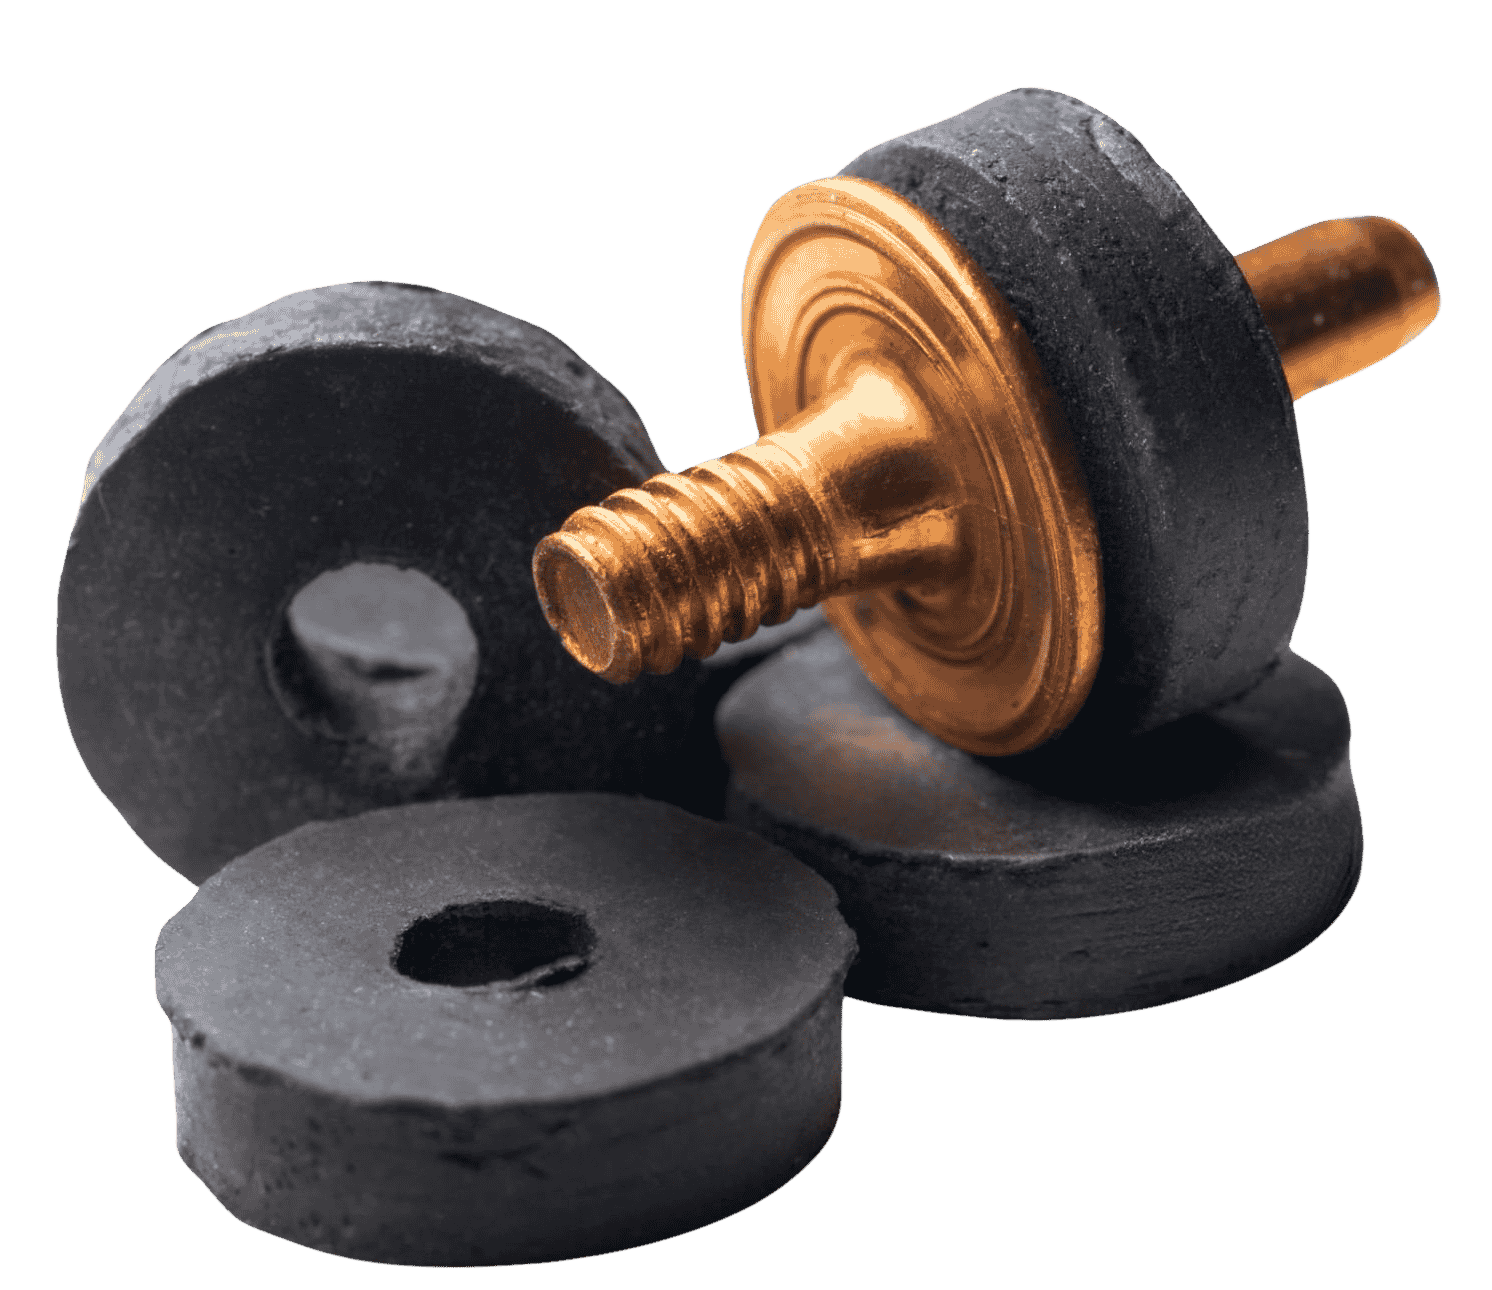
A tap washer is a vital component of your tap that you've probably never actually seen. It sits snugly inside the tap, pressing down against the water outlet to block the supply when not in use. This creates a watertight seal, meaning there's only a flow of water when it's needed, and gives you control over how much water is allowed out.
Without a high-quality, functioning washer, even the best taps can develop a drip. Unfortunately, general wear and tear can make your washer less effective over time, so keep an eye on your taps and replace the washer if needed.
What are the signs your washer needs to be replaced?
There are a few tell-tale signs that it's time to replace your tap washer. These include:
- Constant dripping – If your tap won't stop dripping, even when you've tightened it all the way, this usually means the washer isn't sealing properly and needs to be replaced.
- Difficulty turning the tap on or off – If you've noticed that the tap feels stiff or hard to turn on or off, the washer may be worn down or damaged.
- Limescale buildup – A lot of limescale around the base of the tap can suggest that the washer has become faulty and water is managing to escape. Regular deep cleaning can help prevent limescale buildup and extend the lifespan of your taps.
What types of tap washers are there?
Before you replace your tap washer, it's important to know which type you're working with. There are several types of tap washers on the market, each designed for specific tap mechanisms.
Using the wrong type of washer can stop your tap from sealing correctly, which will only lead to more leaks. Here are the most common varieties you'll find:
- Flat washers – Flat, circular discs with a hole in the middle, typically made from rubber, nylon, or synthetic materials. They're used in most standard compression taps and are excellent at creating a watertight barrier in high-pressure models.
- Cone washers – Slightly conical in shape, these washers are usually made of pliable rubber and are perfect for low-pressure plumbing systems. Their tapered design allows them to wedge tightly into the valve opening, providing a tighter seal to control water flow.
- Fibre washers – Made from materials like paper, fibre, or felt, these washers expand slightly when wet, helping create a tight seal. Because they handle high temperatures without melting or softening, they're the go-to choice for hot-water taps.
- Ceramic tap washers – Designed for ceramic disc taps, these are actually solid ceramic plates rather than flexible rubber discs. They work in pairs inside a cartridge mechanism, sliding over one another to open or block the water pathway.
- Ball washers – Found in single-lever mixer taps, ball washers have multiple chambers to adjust water flow and temperature. They're fitted with rubber O-rings and spring-loaded seals to keep a watertight connection, making turning them on or off simple and smooth.
Where is the tap washer located?
To find your tap washer, you have to look inside the tap's internal structure. It's located right at the very base of the tap valve (often called the tap spindle or cartridge).
When you remove the decorative tap head and use a spanner to unscrew the metal valve body from the tap, you'll be able to see the washer sitting at the bottom. It's usually held in place by a small metal screw or nut, or pushed onto a small central metal pin.
How to fix a dripping tap in 5 simple steps
Whether you're a seasoned DIY-er or just getting started, replacing a tap washer is a simple task. The best part is that the process stays the same for regular taps or mixer models, meaning your sink will be drip-free in no time.
However, it's important to note that, if you use a ceramic or ball washer, these can't be changed out individually. If you're experiencing a leak or drip from a tap with one of these washers, you'll need to replace your entire tap.
What you’ll need:
Changing your tap washer requires a few basic tools, some of which you might already have lying around at home. To replace a washer, you'll need:
- Flat-head screwdriver
- Old cloth
- Adjustable spanner
- New washer
A step-by-step guide on how to replace your tap washer
Once your tools are laid out, follow these five steps to fix your dripping tap:
1. Turn off the water supply
Before you lift a single tool, you need to shut off the water supply to your tap. Working on a live plumbing connection will lead to water spraying all over your kitchen or bathroom, creating a stressful mess.
Look under your sink to find the local isolation valves on the hot and cold water pipes. These are usually small metal valves with a slot that you can turn 90 degrees with a flat-head screwdriver.
If your home doesn't have local isolation valves, or you're replacing a bath tap, you'll need to turn off your main water supply using the stopcock (usually found under the kitchen sink, in a utility cupboard, or somewhere near the front door).
Once the water's turned off, open the tap fully to drain any remaining water left in the pipes.
Brian says: "Turning off the water is crucial to avoid any spills while you're working. It's also a good idea to keep an old cloth or towel to hand, just in case there's any water left in the pipes when you start opening up the tap."
2. Remove the tap head
Now that the pipes are empty, you can safely disassemble the tap.
Start by placing a plug or an old cloth over the basin waste drain.
"This is a small step, but it makes a huge difference, stopping any small screws, washers, or nuts from accidentally slipping down the plughole," says Brian.
Most tap handles are held in place by a small screw, hidden under a decorative cap on top of the tap (often marked with 'H' or 'C' to show whether the tap is hot or cold). Use a flat-head screwdriver to gently pry this cap off. Once the screw is exposed, undo it and carefully lift the tap handle straight up and off the tap body.
"Just remember to take your time with this step to avoid scratching the tap head," Brian adds.
3. Take off the tap valve
With the handle removed, you'll be able to see the brass tap valve sticking out of the top. The valve is what holds the washer in place.
Take your adjustable spanner and fit it around the hexagonal nut on the valve body. Hold the spout with one hand to stop the entire tap from twisting on the basin, then turn the spanner anti-clockwise to loosen the valve. Once it's loose, you can unscrew it the rest of the way by hand and lift it out of the tap chamber.
"If the valve feels stiff or difficult to turn, don't force it, as that can damage the tap," Brian advises. "Try giving it a few gentle turns to work it loose, and if needed, apply a bit of lubricant beforehand to help with any rust."
4. Remove the tap washer
With the valve out, turn it upside down. You'll see the circular rubber washer sitting at the bottom. Depending on the design, it'll be held in place by a small metal screw, a nut, or it might just be pushed onto a central metal peg.
Use your screwdriver to undo the screw or gently pry the old, flattened washer off the peg. Take your time and be careful not to damage the brass valve threads while doing this, as you'll struggle to tighten it again.
Brian says: "This is a good time to inspect the area around the washer for any limescale that needs to be removed or rust, which can impact how well the new washer fits."
He adds, "If there's any mineral buildup, gently clean it off with a damp cloth. However, if there's rust, you might need to use a rust remover. This will help the new washer form a tighter seal and avoid future leaks."
5. Install your new washer
Push your new replacement washer onto the valve stem, fastening it tightly with the screw or nut you removed in the previous step.
Once the new washers are in place, place the brass valve back into the tap body. Twist it in by hand first, then use your adjustable spanner to tighten it (don't over-tighten, as this can wear down the internal threads).
Reattach the tap handle, adjust the securing screw, and push the decorative cap back into place.
Finally, turn your water supply back on slowly and test your handiwork.
Brian notes: "After installing your new tap washer, it's a good idea to turn the water supply back on gradually by opening the isolation valve slowly to check for leaks. This saves you the hassle of a big clear-up if water manages to escape."
"Once you're confident that the washer is firmly in place, fully open the tap to release any trapped air, then close it to make sure the new washer forms a watertight seal. This will help you check that the dripping has stopped."
Discover durable taps at Wholesale Domestic
If you're still dealing with a dripping tap after replacing the washer, the internal brassware or the tap body itself might be damaged beyond repair.
Upgrading your taps is a great way to resolve those pesky leaks once and for all while giving your kitchen or bathroom a fresh, new look. At Wholesale Domestic, we stock a wide selection of reliable bathroom and kitchen taps designed to suit any interior style and budget.
Whether you're looking for dependable basin or bath taps, we've got you covered. Check out our complete guide to bathroom taps to help you find the perfect design for your home.
For more bathroom inspiration, see our blog.